You’re all set to smoke, but there’s a problem—you don’t have a bong. Maybe yours broke, you forgot it, or you just don’t want to spend money on a new one right now. It can be frustrating, but don’t worry! Instead of giving up, you can make your own bong using simple items you already have at home.
Everyday things like bottles, cans, or even fruit can be turned into a working bong with a little creativity. It’s not just a quick and easy solution—it’s also a fun way to solve the problem and add your own personal touch to your smoking setup. Plus, making your own bong can save you money and give you a sense of accomplishment.
What Is a Homemade Bong?
A homemade bong is a pipe you can create using simple household items like plastic bottles or containers. Bong making is a cheap and creative choice for those who don’t want to buy a bong or water pipe from a store.
Making a bottle bong lets you customize it to your liking, reuse everyday items, and enjoy a hands-on project. It’s a fun way to be resourceful while creating something that fits your style.
What Do I Need to Make a Homemade Bong?
1. Plastic Bottle or Container
The plastic bottle acts as the main body of the bong, holding the water and smoke. You can use any size, but a larger bottle allows for bigger hits because it holds more smoke. Bottles like soda bottles or sports drink containers work well. Before starting, remove the cap and ensure the bottle is clean. You can even decorate the bottle to make it unique if you’d like.
2. Metal or Plastic Tubing
The tubing is used to create the downstem and mouthpiece. An empty pen tube, metal straw, or even a piece of garden hose can work. These tubes connect the bowl to the water and let the smoke travel through the bottle. Ensure the tubing is clean and cut to the right length—long enough to reach the water in the bottle but not too long that it’s difficult to use.
3. Aluminum Foil
Aluminum foil is used to make the bowl, which holds your cannabis. You’ll need to fold and shape the foil into a small cup-like structure. Make sure it’s sturdy enough to hold the cannabis and withstand the lighter’s heat without tearing. The bowl should be attached securely to the downstem for smooth airflow. Avoid using thin or flimsy foil as it may tear easily.
4. Tape or Adhesive
Tape or adhesive seals the connections between parts, like where the tubing enters the bottle. This prevents leaks and ensures smooth airflow. Electrical tape or duct tape works well because they are strong and provide a tight seal. If you have a rubber grommet, it can also create a solid seal around the tubing. Check for any leaks after sealing to make sure everything is airtight.
5. Water
Water is a key part of the bong, especially in a homemade water bong, as it cools and filters the smoke, making it smoother to inhale. Pour enough water to submerge the bottom of the downstem, but don’t overfill—too much water can splash into the bowl or mouthpiece when you inhale. If you want a cooler hit, you can add ice cubes to the water for extra filtration and a refreshing effect.
With these details, you’ll have a clear idea of how each component works and what to look for when building your safe homemade bong.
8 Steps To Make A Bong
Building a bong at home is simple and fun with the right steps. If you’re in a pinch or curious about how to make bongs, you can create one using basic items found around the house.
Step 1: Gather Materials

Start by gathering all the materials you’ll need. You’ll require a clean plastic bottle (like a water bottle or soda bottle), a hollow pen tube to act as the downstem, aluminum foil to form the bowl, and tape or glue to secure everything in place.
Also, have scissors and a sharp tool, such as a knife or screwdriver, ready to make precise cuts and holes. Make sure the bottle is sturdy and has no cracks to prevent leaks later. Having all your materials ready makes the process faster and easier.
Step 2: Prepare the Bottle

Wash the bottle thoroughly with warm, soapy water to remove any dirt, residue, or leftover liquids. This step is important to ensure a clean smoking experience and remove any unwanted odors.
After cleaning, dry the bottle completely, as wet surfaces can make it harder to work with. Remove any labels or stickers from the outside of the bottle so you have a clear area to work on and can see your progress as you build the bong.
Step 3: Add the Downstem

The hollow pen tube will serve as the downstem, which allows smoke to travel through the water for filtration. Use your sharp tool to carefully cut a small hole near the bottom of the bottle, just big enough to fit the pen tube snugly.
Insert the tube at a slight angle pointing upward. This angle ensures smooth airflow and prevents water from spilling out. Once the tube is in place, use tape or glue to seal the hole around it, ensuring it’s completely airtight. Test it by blowing into the tube; if air escapes, add more tape or glue until it’s fully sealed.
Step 4: Create a Carb Hole

The carb hole helps control airflow while smoking. Use your sharp tool to make a small hole on the side of the bottle, slightly above the waterline.
This hole should be easy to cover with your finger. Be careful while making the hole to avoid cracking the bottle or creating sharp edges. The carb hole allows you to clear the smoke from the bottle when you’re ready to inhale.
Step 5: Make the Bowl

Shape a piece of aluminum foil into a small, sturdy bowl that will hold your smoking material. The foil should fit securely over the open end of the downstem.
Poke a few tiny holes in the bottom of the foil bowl with a pin or toothpick. These holes allow smoke to pass through without letting your material fall out. Make sure the bowl is stable and won’t tip or collapse when in use.
Step 6: Add Water to the Bottle

Fill the bottle with enough water to submerge the bottom of the downstem. The water acts as a filter, cooling the smoke and making it smoother to inhale.
Don’t overfill the bottle, as too much water can splash up or make it harder to draw air through the bong. A good level is just an inch or two above the bottom of the downstem.
Step 7: Test for Leaks and Functionality
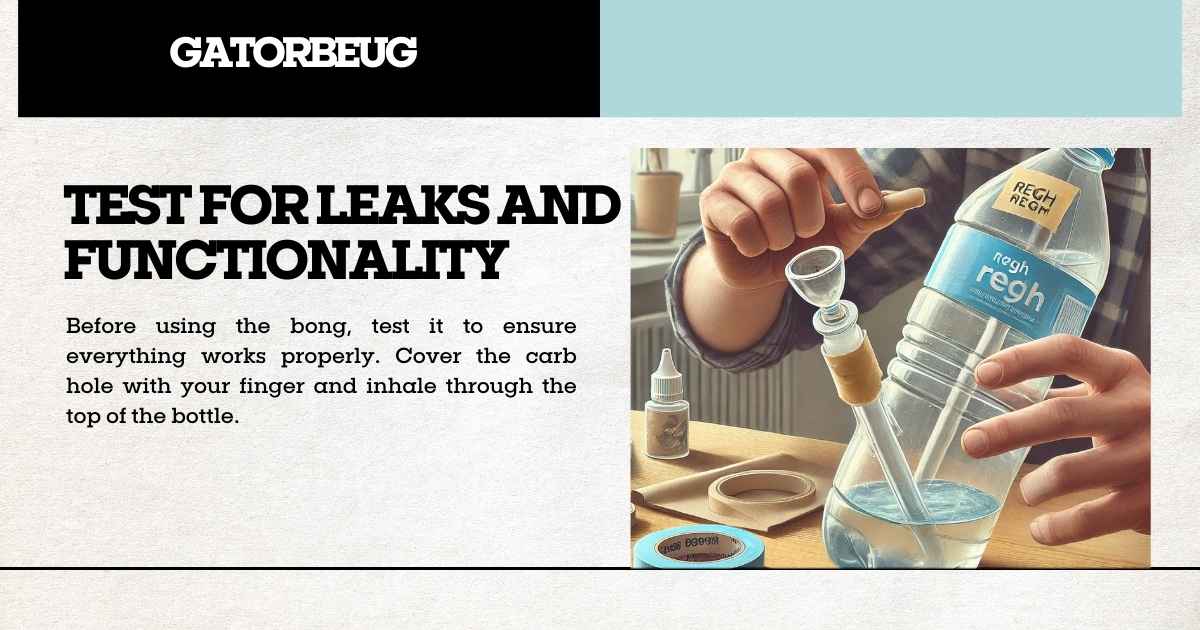
Before using the bong, test it to ensure everything works properly. Cover the carb hole with your finger and inhale through the top of the bottle.
You should feel resistance, which means the setup is airtight. If you notice air leaks around the downstem or other parts, seal them with more tape or glue. This step is important for a smooth and efficient smoking experience.
Step 8: Use and Enjoy
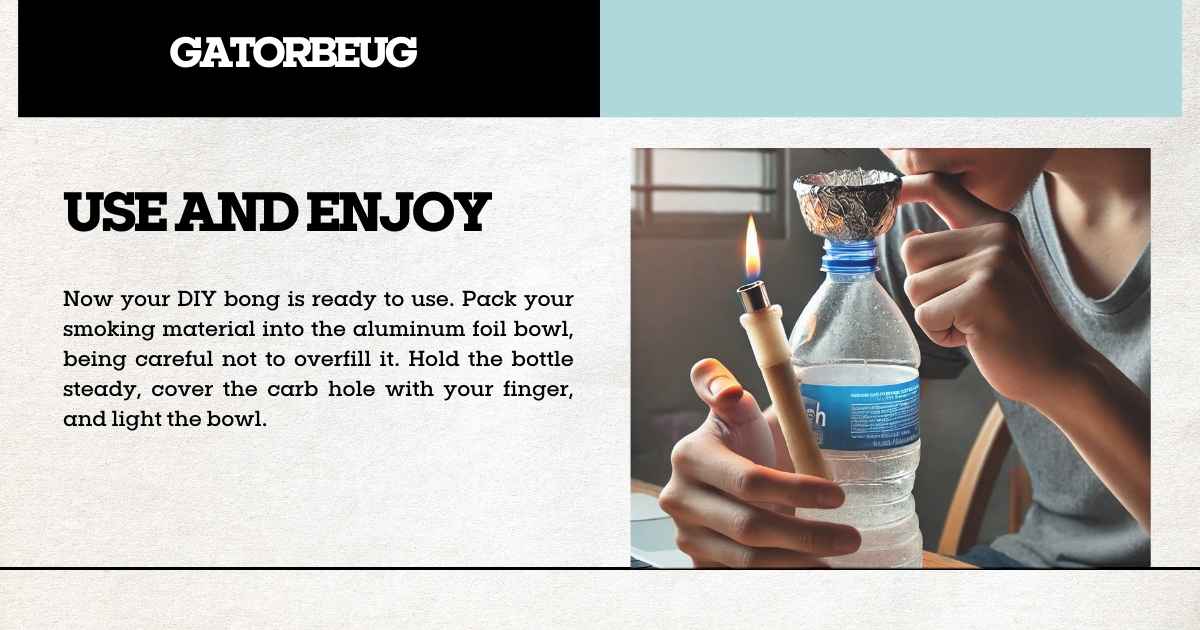
Now your DIY bong is ready to use. Pack your smoking material into the aluminum foil bowl, being careful not to overfill it. Hold the bottle steady, cover the carb hole with your finger, and light the bowl. For a smooth and refreshing experience, pair your homemade bong with a blood orange THC drink.
Inhale slowly through the top opening, letting the smoke fill the bottle. When you’re ready, release the carb hole to clear the smoke. Take your time, and enjoy the smoother hits provided by the water filtration.
5 Benefits of Making a Bong
Making a bong with everyday items is a fun, affordable, and creative way to enjoy smoking weed, offering plenty of homemade bong ideas to try.
- Saves Money: Using things you already have at home can save you a lot of money. Instead of spending on expensive store-bought bongs, you can repurpose items like bottles, cans, or plastic containers.
- Personal Touch: When you make your own bong, you’re in charge of its look and feel. Add special features, like extra holes for airflow or a unique mouthpiece, to make it truly your own. It’s like having a custom-made bong without the cost.
- Easy to Find Materials: You don’t need fancy tools or rare items to make a bong. Everyday objects like water bottles, soda cans, or even fruit like apples can work. These materials are easy to find at home or nearby, which means you can create your bong quickly without needing to go out and shop.
- Fun DIY Project: Making a bong is more than just crafting a smoking device; it’s a fun and creative activity. You get to experiment with different ideas, learn new skills, and enjoy the satisfaction of building something yourself.
- Helps the Environment: Repurposing old or unused items to make a bong reduces waste and helps the environment. Instead of throwing things away, you give them a new purpose. This approach promotes sustainability and encourages a more mindful way of living.
Making a bong at home combines creativity, practicality, and fun, making it a great alternative to store-bought options. Plus, it’s a cool way to explore your resourceful side while enjoying a personalized experience.
Balance Fun with Simple Creativity
Making a bong at home shows that creativity and resourcefulness can go a long way, but it’s also a reminder of the balance between having fun and being responsible. Just like in life, it’s about finding simple, clever solutions without overcomplicating things. If you’re repurposing materials or coming up with new ideas, the process teaches us to make the most of what we have while enjoying the moment- kind of like kicking back with a pineapple mango THC drink, where great flavors and relaxation come together effortlessly.
Ready to take your smoking experience to the next level? While making a bong at home is creative, Gatorbeug offers premium, stylish bongs designed for the perfect balance of function and fun. Skip the hassle and choose a high-quality option that’s built to last. Shop our collection today and find the perfect piece to enjoy your moments in style.